How Do I Program A LiftMaster Remote? Your Complete Step-by-Step Guide
How do I program a LiftMaster remote? If you’ve ever found yourself standing in your garage, manually lifting a heavy door because your remote stopped working, you know the frustration. A malfunctioning garage door remote isn't just an inconvenience; it can disrupt your entire routine. The good news is that programming a new LiftMaster remote or reprogramming an existing one is a straightforward DIY task for most homeowners. This comprehensive guide will walk you through every method, from the classic Learn Button to the modern MyQ app, and equip you with the troubleshooting knowledge to solve common problems. By the end, you’ll confidently handle everything from initial setup to battery changes and know exactly when a replacement is necessary.
Understanding Your LiftMaster Garage Door Opener System
Before diving into programming, it’s helpful to understand the core components of your system. LiftMaster and its sister brand, Chamberlain, primarily use a rolling code security technology. This means the code changes with every use, making it nearly impossible for someone to duplicate your signal. The heart of this system is the Learn Button on your opener's motor unit. This button puts the opener's receiver into programming mode, allowing it to "learn" the signal from your remote, keypad, or vehicle's Homelink system.
Your specific model will determine the exact programming process. Most modern LiftMaster and Chamberlain openers (manufactured since 1993) use the Learn Button method. Older models might use DIP switches, but this guide focuses on the more common and secure rolling code systems. Locate your opener's model number on a sticker on the back or side of the motor unit. This number is your best friend for finding precise instructions and checking compatibility for any replacement parts.
Step-by-Step Programming: The Learn Button Method
The most universal and reliable method for programming a LiftMaster remote is using the Learn Button on the opener itself. This process typically takes less than 30 seconds per button.
1. Access the Learn Button: Safely position a ladder if needed. On the back or side of your garage door opener's motor unit, locate a small, colored button (usually red, purple, or yellow) often behind a light cover. It’s labeled "Learn" or "Learn Code."
2. Enter Programming Mode: Press and release the Learn button once. The indicator light on the opener will turn on, or an LED will begin to blink. You now have approximately 30 seconds to complete the next step.
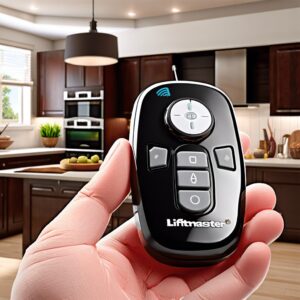
3. Program the Remote: On your remote control, press and hold the button you wish to program (e.g., the large button on top). Hold it for about 3 seconds, or until the opener's light bulb flashes or you hear a click. The remote's LED may also blink.
4. Test: Press the programmed button on your remote. Your garage door should operate. If it doesn't, repeat the process. Ensure you press the Learn button briefly—a long press can erase all previously programmed remotes.
Pro Tip: You can usually program multiple remotes by repeating steps 2 and 3 for each remote within the 30-second window after a single Learn button press.
Programming via the Door Control (Wall Console)
Some LiftMaster models allow programming directly from the wall-mounted door control, which can be more convenient than reaching the opener.
- On the door control, press and hold the "Learn" or "Program" button (often located on the back or under a flip cover) until the LED turns on.
- Press the button on your remote you want to program.
- The control's LED will go out or change color, indicating success. Test the remote.
Programming with the MyQ App (For Wi-Fi Openers)
If you have a LiftMaster opener with built-in Wi-Fi (look for the MyQ logo), you can manage everything from your smartphone.
- Download and open the MyQ app. Create an account and follow prompts to add your opener.
- In the app, go to your opener's settings and select "Add Remote" or "Program Remote."
- The app will instruct you to press the Learn button on your opener. Once done, press the button on your physical remote.
- The app will confirm the remote is added. You can now also use the app as a virtual remote.
Programming Your Car's Homelink System
Integrating your garage door with your car's built-in Homelink system provides ultimate convenience.
- Start with your car parked outside the garage, ignition in "On" or "Accessory" mode.
- Press and hold the desired Homelink button (in your visor or mirror) until the indicator light flashes slowly.
- While holding the Homelink button, press and release the Learn button on your garage opener.
- When the opener's light flashes, release the Homelink button. The Homelink indicator should flash rapidly, then stay solid.
- Test by pressing the Homelink button. You may need to repeat the sequence for some vehicles.
Troubleshooting: Why Your LiftMaster Remote Isn't Working
Is your garage door opener remote not working? Before assuming it's broken, work through these common causes. According to industry data, over 80% of "dead remote" issues are resolved with simple fixes.
- Weak or Dead Batteries: This is the #1 culprit. Always start here.
- Signal Interference: Other wireless devices (baby monitors, certain LED bulbs, security systems) can block your remote's signal. Try operating the door from different spots.
- Blocked Antenna: Ensure the antenna wire hanging from your opener motor unit is not damaged or coiled tightly.
- Opener Lock Engaged: Check if the "Vacation/Lock" button on your wall control is activated. This disables all remotes.
- Receiver Issues: The opener's logic board may need a reset. Unplug the opener for 30 seconds, then plug it back in.
- Opener System Fault: If the door operates manually but not by remote, the issue is likely with the remote or receiver. If the opener itself won't run, there may be a problem with the motor, trolley, or safety sensors.
How to Reset Your Garage Door Opener: To clear all programmed remotes and keypads, press and hold the Learn button for 6-10 seconds until the LED goes out. All previous codes are erased. You must then reprogram all desired devices.
Compatibility and Model-Specific Programming
Not all remotes are universal. Compatibility is critical.
For LiftMaster and Chamberlain: Most remotes from the last 30 years are compatible with openers using the Learn button. Check the remote's model number (e.g., 891LM, 893LM) against your opener's compatibility list on the manufacturer's website.
Important Note on Genie Intellicode: The key sentence mentions a remote "specifically designed for genie intellicode openers manufactured since 1997." This is a universal remote (like the 891LM) that works with Genie's rolling code system (Intellicode). It does not work with older Genie models that use DIP switches. Always verify your Genie opener has a Learn button, not a row of switches.
How to Reprogram a Remote for a LiftMaster LA-400: The LA-400 is a specific, older model. Its process is slightly different:
- Press the Learn button on the opener.
- On the remote, enter your 4-digit PIN code (if it's a keypad remote) or press the button.
- The opener's light will flash to confirm. The sentence "I hit the learn button inside the box typed in the code on my remote" describes this keypad-specific step.
Controlling Multiple Doors: As noted, a single multi-button remote (like the 893LM with three buttons) can be programmed to operate up to three different garage door openers or gates. Simply repeat the Learn button process for each button, pointing at the corresponding opener.
Battery Replacement: A Simple Maintenance Task
How do I change batteries in a LiftMaster remote? It’s simpler than you think and takes under 5 minutes.
- Identify the Battery Type: Most LiftMaster remotes use a CR2032 3V lithium coin cell. Some larger remotes use AA or AAA. Check the old battery or your manual.
- Open the Casing: There is usually a small screw or a seam along the remote's edge. Gently pry it open with a flathead screwdriver.
- Replace the Battery: Remove the old battery. Insert the new battery with the positive (+) side facing up (usually marked on the plastic holder). Ensuring correct polarity is critical.
- Reassemble and Test: Snap the remote back together. Reprogramming is not needed after a battery change for most models, as the code is stored in memory. Simply test the remote.
Replacing the battery in a LiftMaster remote is a simple process that can be completed in a few minutes. By following these steps, you can ensure your remote is always working properly and avoid unexpected lockouts.
Security Advice and Final Recommendations
Modern rolling code technology provides strong security, but you can enhance it:
- Regularly update your MyQ app and opener's firmware.
- Never share your remote or leave it visible in your car.
- If a remote is lost or stolen, immediately erase it from the opener using the Learn button reset and reprogram your remaining devices.
Conclusion: Effortless Access is Within Your Reach
Programming your LiftMaster garage door opener remote, keypad, or Homelink system is an empowering DIY skill. The core process—using the Learn Button—is designed to be user-friendly. Remember the golden rule: press the Learn button briefly, then quickly press your remote's button. When issues arise, methodically check the battery first, then consider signal interference or a simple reset.
Get started today and enjoy effortless access. Armed with this guide, you can troubleshoot signal glitches, replace a battery in minutes, and confidently program multiple devices. Understanding your system's compatibility and following the precise sequence for your model—whether it's a standard LiftMaster, a specific LA-400, or a Genie Intellicode system—ensures a seamless setup. Should you ever encounter persistent problems after exhausting these steps, consult your model-specific manual or contact a certified LiftMaster technician. Your garage door security and convenience are worth the minor effort to master these simple controls.