How To Replace A Crankshaft Position Sensor: A Complete DIY Guide To Fix Stalling & Restore Performance
Is your car stalling unexpectedly, struggling to start, or has the dreaded check engine light come on? These frustrating issues often trace back to a single, critical component: the crankshaft position sensor (CKP). This small but mighty part tells your engine's computer exactly where the crankshaft is, enabling precise fuel injection and spark timing. When it fails, your vehicle's performance plummets. But here’s the good news: replacing a crankshaft position sensor is a surprisingly straightforward DIY job that most car owners can handle with basic tools, saving hundreds of dollars in mechanic fees. This comprehensive guide will walk you through everything you need to know—from understanding what the sensor does to a step-by-step replacement process—so you can fix stalling, restore engine performance, and turn off the check engine light yourself.
What Is a Crankshaft Position Sensor and Why Does It Matter?
The crankshaft position sensor is an electronic device that monitors the rotational speed and position of the crankshaft. It sends this real-time data to the engine control unit (ECU), which uses it to control ignition timing and fuel injection. Without accurate readings, the ECU can't synchronize these processes, leading to misfires, poor fuel economy, and engine stalls. It works in tandem with the camshaft position sensor to ensure valves open and close at the correct moments relative to piston position. Together, they form the foundation of your engine's "brain."
A malfunctioning crankshaft position sensor usually causes a few symptoms that alert the driver to a potential problem that needs to be addressed. These include:
- Engine stalling or cranking but not starting (like the 2024 Polaris Sportsman issue mentioned in our example).
- Rough idling or frequent misfires.
- Sudden loss of power while driving.
- Increased fuel consumption.
- A illuminated check engine light, typically with codes like P0335 (Crankshaft Position Sensor "A" Circuit) or P0016 (Crankshaft Position - Camshaft Position Correlation).
Instead of just talking about symptoms, let's talk about how to replace a crankshaft position sensor today. Understanding the "why" helps you confirm the diagnosis before you start wrenching.
Diagnosing a Bad Crankshaft Position Sensor
Before you buy a part and start the repair, proper diagnosis is key. A check engine light alone isn't enough—many issues trigger the same code. Here’s how to confirm the CKP sensor is the culprit:
- Scan for Codes: Use an OBD-II scanner to read the trouble code. A P0335 or similar is a strong indicator. However, codes related to camshaft sensors or ignition system malfunctions can also point to a CKP issue.
- Live Data Check: A more advanced scan tool can show you the sensor's voltage signal and frequency as the engine cranks. erratic or no signal confirms a bad sensor.
- Visual Inspection: Locate the sensor (more on that below) and check for obvious damage—cracked housing, frayed wiring, or oil/contaminant buildup.
- Testing Resistance: With a multimeter, you can often test the sensor's resistance circuit when the engine is cool. Consult your vehicle's service manual for specific specs, but a reading of "OL" (open loop) or significantly out of range means replacement is needed.
Pro Tip: Sometimes, the issue isn't the sensor itself but the wiring harness or connector. Inspect these thoroughly for corrosion, breaks, or loose connections before concluding the sensor is dead.
Tools and Parts You'll Need for the Job
Do this easy job yourself with simple tools, and save $$$. You likely already have most of what you need in your garage. Here’s your checklist:
Essential Tools:
- Socket set (common sizes: 10mm, 13mm, 15mm, 18mm)
- Ratchet and extensions
- Screwdrivers (flathead and Phillips)
- Torque wrench (critical for proper installation)
- Multimeter (for pre-installation testing)
- Flashlight or work light
- Gloves and safety glasses
Parts & Consumables:
- Replacement Crankshaft Position Sensor: This is the star of the show. Ensure it's an exact match for your vehicle's make, model, year, and engine type. OEM (Original Equipment Manufacturer) parts are reliable but often pricier; high-quality aftermarket brands like Bosch, ACDelco, or NTK are excellent cost-effective alternatives.
- Sealant/Gasket: Some sensors use a rubber O-ring; others require a thin layer of high-temperature RTV silicone or a specific gasket. Check your new sensor's instructions and your service manual.
- Dielectric Grease: For the electrical connector to prevent future corrosion.
- Clean rags and a mild degreaser.
Important Note on Sensor Sets: This set includes both the crankshaft position sensor (tells the computer where the crankshaft is) and camshaft position sensors (tracks camshaft position) that work together for proper ignition timing. While you're often only replacing the CKP, if your vehicle has high mileage or multiple related codes, consider a camshaft sensor replacement kit to preempt future issues.
Step-by-Step Guide: How to Replace a Crankshaft Position Sensor
This guide on how to fix a crankshaft position sensor will walk you through the steps to diagnose, remove, and replace a defective crankshaft position sensor, helping you restore your vehicle’s optimal performance. Always refer to your specific vehicle's service manual for unique procedures and torque specs.
Step 1: Safety First & Preparation
- Park on a level surface, engage the parking brake, and disconnect the negative battery terminal. This prevents any accidental engine start or electrical short.
- Allow the engine to cool completely if recently run. The exhaust manifold and sensor can be extremely hot.
- Locate your CKP sensor. The crankshaft position sensor is typically located near the engine’s crankshaft pulley or flywheel housing, while the camshaft position sensor is near the camshaft or cylinder head. Common locations include:
- Mounted on the front of the engine, behind the harmonic balancer.
- On the side of the engine block, near the transmission bellhousing.
- Inside the transmission bellhousing (more common on some imports).
- Consult your manual or a reliable online repair database (like Alldata or Mitchell) for the exact position on your car.
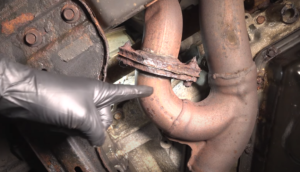
Step 2: Remove the Old Sensor
- Once located, clear any obstructions like heat shields, wiring brackets, or the engine cover.
- Disconnect the electrical connector first. Press the tab and pull firmly. Do not pull on the wires.
- Remove the mounting bolt(s). They are often tight and may require penetrating oil if corroded. Use the correct socket to avoid rounding the bolt head.
- Carefully pull the sensor straight out. It may be stuck due to heat or O-ring seal. Gently twist it if needed. Avoid using excessive force that could damage the sensor housing or the threads in the engine block.
Step 3: Prepare for Installation
- Inspect the mounting hole and clean it with a lint-free cloth. Remove any old gasket material or debris.
- If your new sensor requires sealant, apply a thin, even bead of high-temperature RTV to the sensor's O-ring or mounting surface (as per instructions). Do not over-apply, as excess can contaminate the sensor.
- Apply a small amount of dielectric grease to the inside of the new sensor's electrical connector to prevent moisture and corrosion.
Step 4: Install the New Sensor
- Carefully insert the new sensor into the mounting hole, ensuring it's seated properly and straight. The sensor tip must not contact the reluctor wheel (the toothed ring on the crankshaft) or harmonic balancer.
- Hand-tighten the mounting bolt(s) to avoid cross-threading.
- Torque the bolt to the manufacturer's specification (found in your service manual). Over-tightening can crack the sensor housing; under-tightening can cause leaks or vibration issues. A typical range is 8-15 ft-lbs, but always verify.
- Reconnect the electrical connector until you hear a definite click. Ensure it's secure and routed away from hot or moving parts.
Step 5: Final Checks and Reconnection
- Reinstall any components you removed (heat shields, covers).
- Reconnect the negative battery terminal.
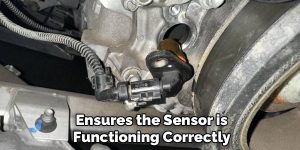
- Turn the ignition to the "ON" position (without starting) to allow the ECU to recognize the new sensor. You may hear the fuel pump prime.
- Start the engine. It may crank a bit longer initially as the ECU learns the new sensor's signal.
- Let it idle and check for smooth operation. Use your OBD-II scanner to clear the stored check engine light codes. If the light returns immediately or symptoms persist, double-check your installation and wiring.
Matching the New Sensor to Your Vehicle
Find out what a crankshaft position sensor is, what goes wrong with it, and how to match the new sensor with your vehicle. Compatibility is non-negotiable. A mismatched sensor can cause severe engine damage. Here’s how to get it right:
- VIN is King: The most reliable method is using your Vehicle Identification Number (VIN) at an auto parts store or online retailer. They can cross-reference it to the exact OEM part number.
- OEM Part Number: Locate the part number on your old sensor (it's usually stamped on the housing) and search for it. This guarantees an identical replacement.
- Vehicle Specs: At minimum, you'll need Year, Make, Model, Engine Size (e.g., 2.0L Turbo), and sometimes Transmission Type.
- Sensor Type: Note the connector shape and number of pins. Also, is it a magnetic (variable reluctance) or Hall effect sensor? Your manual or old sensor will indicate this. Hall effect sensors are more common in modern vehicles and often have a 3-wire connector.
- Buy from Reputable Sources: Stick with known brands. Cheap, no-name sensors often fail prematurely and can cause the same problems you're trying to fix.
When to Consider Professional Help
For these reasons, it’s crucial to know how to replace a crank position sensor when issues arise. However, there are scenarios where professional intervention is safer and more cost-effective:
- Sensor is located in a difficult spot, such as behind the timing cover or inside the transmission bellhousing. This can require removing major components like the starter, harmonic balancer, or even the transmission.
- You lack the necessary tools (e.g., torque wrench, specialty sockets).
- Diagnosis is unclear, and multiple codes point to more complex issues like timing belt/chain problems or ECU faults.
- You are uncomfortable working with engine electronics.
If you find yourself in this position, finding a reputable mechanic is essential. Find the best repair shops for crankshaft position sensor replacement in Portland, Summit, or Middleton. A great way to vet shops is to look for RepairPal Certified facilities. All RepairPal Certified repair facilities perform quality work at fair prices, backed by a rigorous certification process that checks for technician training, equipment, customer reviews, and a minimum 12-month/12,000-mile warranty on repairs.
How to Find a Certified Shop Near You:
- Visit the RepairPal website.
- Enter your zip code (e.g., for Portland, OR; Summit, NJ; or Middleton, WI).
- Browse the list of certified shops, read reviews, and compare estimated labor costs.
- Call for a precise diagnosis and quote before authorizing work.
A Real-World Example: The 2024 Sportsman Case
Here's my deal: I have a 2024 570 Sportsman and I have the famous crankshaft position sensor code, and the motor turns, sometimes coughs, but won't start. This is a classic symptom pattern. The engine can crank and even fire a cylinder or two (the "cough"), but without consistent crankshaft position data, the ECU can't sustain combustion, leading to a no-start condition. On a utility vehicle like a Polaris Sportsman, the CKP sensor is often mounted on the side of the engine case, near the flywheel. The replacement process is similar to an automotive engine but may require specific tools for the engine's shroud and clutch cover. The principle remains identical: diagnose, locate, remove, and install with proper torque and sealing.
Common Mistakes to Avoid
Even with a simple job, mistakes can turn a quick fix into a major headache. Steer clear of these pitfalls:
- Forgetting the Battery Disconnect: Risk of shorting electronics or accidental engine start.
- Ignoring the Seal: Not using the correct sealant or O-ring can lead to oil leaks or sensor contamination.
- Over-Torquing: Cracked sensor housing is a common result. Use a torque wrench!
- Dropping or Contaminating the Sensor: The sensor tip is sensitive. Keep it clean and avoid impacts.
- Not Clearing Codes: After replacement, use a scanner to clear the light. It won't turn off on its own.
- Reusing Old Bolts: If the mounting bolt is corroded or stretched, replace it. A sheared bolt in the block is a nightmare.
Conclusion: Take Control of Your Vehicle's Health
Understanding how to replace a crankshaft position sensor empowers you as a vehicle owner. You’ve learned that this sensor is the linchpin of your engine's timing system, that failure causes specific and disruptive symptoms, and that the replacement process—while requiring care and the right parts—is very much a doable DIY project. By following the systematic diagnosis, using the correct tools, matching the exact replacement part, and adhering to torque specifications, you can fix stalling, restore engine performance, and turn off the check engine light without a dealership visit.
Remember the core workflow: Diagnose Confidently → Source the Correct Part → Execute Carefully → Verify Success. If at any point the repair scope exceeds your comfort zone—especially if the sensor is buried deep within the engine or transmission—don't hesitate to seek a RepairPal Certified professional. Their commitment to quality and fair pricing ensures your vehicle is in good hands. Now, with this knowledge, you're equipped to tackle this common repair, save significant money, and keep your car running smoothly for miles to come.