Putting Coal In Your Dutch Oven: The Complete Guide To Masterful Outdoor Cooking
Have you ever wondered how to put coal in an oven—specifically, a trusty Dutch oven—and achieve perfectly cooked meals every time? Whether you're a beginner just starting with campfire cuisine or an experienced outdoor cook looking to refine your technique, understanding coal placement is the secret sauce to Dutch oven mastery. It’s not just about dumping briquettes; it’s about strategic heat management, safety, and technique. In this comprehensive guide, we’ll walk through everything from the fundamentals of coal arrangement to advanced flavor methods, ensuring your next outdoor feast is a resounding success.
The Fundamentals: Why Coal Placement is Everything
When it comes to Dutch oven cooking, it's very important to know how and where to place your coals. This isn't just a minor detail—it’s the core principle that dictates whether your food will bake evenly, simmer gently, or sear with intensity. The Dutch oven is a versatile tool, but its performance hinges entirely on your ability to control the heat source surrounding it.
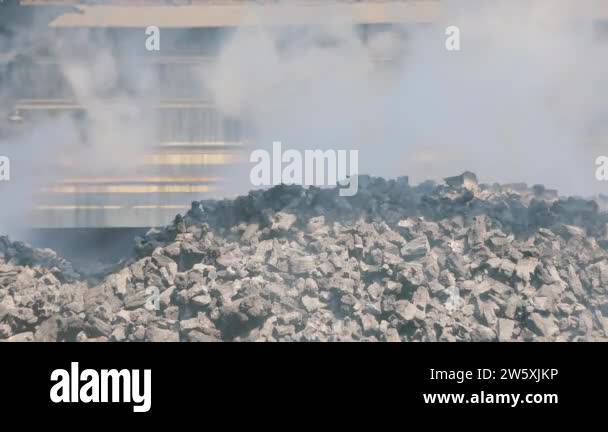
Understanding Your Fuel: Hardwood Charcoal vs. Real Wood
We're cooking with hardwood charcoal or real wood, so we'll walk through how to do that. Each fuel type has distinct characteristics:
- Hardwood Charcoal: Burns hotter, cleaner, and more consistently than standard briquettes. It produces less ash and is easier to manage for precise temperature control, making it a favorite for serious Dutch oven enthusiasts.
- Real Wood (Seasoned Hardwood): Offers a classic, smoky flavor but burns less predictably. It requires more attention as heat output can vary significantly between different wood types (oak, hickory, maple) and even between pieces from the same log.
Your choice of fuel affects not only flavor but also how you arrange your coals. Charcoal allows for more mathematical placement, while wood often requires a more intuitive, "feel-based" approach.
The Basic Coal Arrangement: A Foundation for Success
For most cooking, you’ll arrange coals in one of two patterns:
- For Simmering/Slow Cooking (Stews, Braises): Place the majority of your coals on the lid with a smaller ring on the bottom. This creates an enclosed, oven-like environment with gentle, all-around heat.
- For Baking/Browning (Breads, Casseroles): You’ll use more coals on the bottom to generate direct radiant heat upward, with coals on the lid to create top-down heat and prevent excessive browning on the top before the bottom cooks through.
Pro Tip: Always start with fewer coals than you think you need. You can always add more, but you can't take heat away quickly. The great glory of the grill (and Dutch oven) is its versatility to deliver different types of heat, with coal arrangement being a main player in this arena.
Mastering Temperature Control: The Printable Chart & Key Principles
Learn how many coals to use, which ovens are safe, and master temperature control. This is where precision meets practicality.
Decoding the Charcoal Temperature Chart
Use this printable Dutch oven charcoal temperature chart to determine the number of coals needed to reach your desired cooking temperature. While a physical chart is ideal, here’s the core logic:
- Rule of Thumb: For every 2 inches of Dutch oven diameter, you typically need about 1 coal on the bottom and 1 on the lid for a moderate 325°F (163°C). A 12-inch oven would then start with ~6 coals on bottom and ~6 on lid.
- Adjust for Conditions: Increase coals by 25-50% on a windy day or in cold ambient temperatures. The stove temperature could change with the outside wind, a challenge noted even in historical coal stove use.
- The "Ring" Method: Visualize your coals arranged in a ring around the outer edge of the oven and lid, avoiding the center. This promotes even circulation and prevents hot spots.
Safety First: Oven Selection & Handling
- Oven Safety: Only use Dutch ovens made for campfire use—typically cast iron with three sturdy legs and a flat, rimmed lid. Never use a standard kitchen Dutch oven on an open fire, as the direct flame can damage seasoning and warp metal.
- Handling: Always use long-handled tongs and heat-resistant gloves (like leather welding gloves) to place and adjust coals. Have a metal ash bucket and water source nearby for safety.
Baking Perfection: Coals on the Lid & Essential Techniques
Yes, you can put coals on a Dutch oven lid—it's key for baking. This technique transforms your pot into a true miniature oven.
Why the Lid Matters
Coals on the lid provide crucial top-down radiant heat. Without it, the top of your bread or casserole would remain pale and doughy while the bottom burns. The coals on the lid also create a consistent internal temperature by radiating heat downward.
The Pebble Trick: Elevate Your Baking
Next time, put the pan on top of the pebbles to raise up the baking dish from the bottom. This simple hack is a game-changer.
- How: Place 3-4 clean, dry pebbles or small stones in the bottom of your Dutch oven before inserting your baking dish (like a loaf pan or pie tin).
- Why: This creates an air gap between the direct heat source (bottom coals) and your bakeware. This alone will help in regulation of the baking, ensuring the bottom cooks evenly without scorching. It also promotes better air circulation, which will open up pies, other cakes, dessert ideas for you to try with confidence.
Recipe Spotlight: Dutch Oven Ribs
Dutch oven ribs are an easy but impressive dinner for home or when you're out camping. The key is the low-and-slow method with coals predominantly on the lid.
- Season ribs, place on a rack or directly in the oven.
- Use a coal arrangement of 1:2 (bottom:lid) for a steady 275-300°F.
- Cook for 3-4 hours, maintaining coal levels, until meat is tender.
- Finish with a glaze under more direct heat (more bottom coals) if desired.
Advanced Flavor: Introducing the Dhungar Method
One technique that elevates dishes from great to unforgettable is the Dhungar method, a South Asian way of introducing a buttery, smoky flavor as a finishing touch to food. It involves an encounter between ghee and hot coals in a lidded pot.
How to Perform the Dhungar Method:
- Cook your main dish (e.g., a dal, curry, or lentil stew) in the Dutch oven as usual.
- Once cooked, create a small bed of 2-3 hot coals in the center of the pot.
- Place a small, heat-proof bowl or piece of foil with 1-2 teaspoons of ghee (clarified butter) directly on the coals.
- Immediately cover the Dutch oven tightly with its lid.
- Let it smoke for 3-5 minutes. The ghee will vaporize, infusing the food with a deep, aromatic smokiness.
- Carefully remove the coals and bowl before serving.
Caution: This is a finishing technique. Do not attempt to cook the entire dish this way, and ensure all coals are removed before serving.
A Glimpse into History: The Labor of Coal Stoves
To appreciate modern Dutch oven convenience, consider the historical context. In an experiment, it required about an hour a day to care for a coal stove, with 292 pounds of coal and 14 pounds of kindling put in the stove over 6 days. Stove temperature could change with the outside wind, and stoves had to be polished with blacking to prevent them from rusting (Strasser, 1983, pp. 45-47).
While our campfire Dutch ovens are simpler, the principles remain: consistent fuel management and protection from the elements (rust) are timeless challenges. Modern cast iron seasoning is our version of "blacking," and diligent coal management is our answer to the hour-a-day tending.
Troubleshooting & Common Questions
The Minecraft Conundrum: A Metaphor for Real-World Flow
You might have seen questions like: "Hey, how do I automate a coke oven? My problem is that the coal I want to pump into it drops down when the inventory is full. I've tried to use gates onto my wooden pipe, but it doesn't seem to work. A video tutorial would be the greatest."
While this refers to the game Minecraft, it highlights a universal problem: managing flow and capacity. In real Dutch oven cooking:
- Problem: Coals "drop down" (burn out or shift) when you need consistent heat.
- Solution:Maintain a reserve. Always have a pile of pre-lit coals ready to add. Use a coal basket or metal bucket to transport and store hot coals safely. Think of your coal management as a system—you need input (lit coals), throughput (placement), and output (ash removal).
FAQ: Your Burning Questions Answered
Q: Can I use briquettes instead of lump charcoal?
A: Yes, but briquettes contain fillers and binders that produce more ash and can affect flavor. Lump charcoal is purer and burns hotter. If using briquettes, expect to use about 15-20% more and clean ash more frequently.
Q: How do I know when to add more coals?
A: Watch your food and feel the heat radiating from the oven (carefully, from a distance). If a simmer drops to a bare bubble or baking slows significantly, it's time to add 2-3 pre-lit coals to the ring.
Q: What’s the best way to extinguish coals after cooking?
A: Never use water on a hot Dutch oven—it can cause thermal shock and crack the cast iron. Simply spread the coals out in your fire pit to cool naturally. Once cold, dispose of ash properly.
Beyond Cooking: Gifting the Dutch Oven Lifestyle
No matter the occasion, we have the perfect gift card for you! While the key sentences mention specific retailers, the sentiment is perfect for the Dutch oven enthusiast. Consider gifting:
- A gift card to a local outdoor gear store for a quality Dutch oven, charcoal, or accessories.
- A gift certificate for a Dutch oven cooking class—an experience that teaches the very techniques in this guide.
- Pre-paid cards for grocery stores to buy quality meats and ingredients for a Dutch oven feast.
Conclusion: The Reward of the Flame
Mastering how to put coal in an oven—your Dutch oven—is a journey from simple sustenance to soulful craft. It connects you to centuries of cooking tradition, from the labor-intensive coal stoves of the past to the efficient, flavorful methods we enjoy today. By understanding coal placement, leveraging temperature charts, embracing techniques like the pebble trick and Dhungar method, and learning from both history and virtual simulations, you gain more than just a cooked meal. You gain confidence, creativity, and a profound appreciation for the elemental joy of cooking with fire.
So, gather your charcoal, arrange your coals with purpose, and remember: every great Dutch oven meal starts not with a recipe, but with the thoughtful, deliberate placement of a few hot coals. Now, go create something delicious.
{{meta_keyword}} dutch oven cooking, coal placement, charcoal temperature chart, campfire cooking, outdoor baking, Dhungar method, cast iron cooking, coal management, Dutch oven tips, hardwood charcoal, baking with coals, Dutch oven ribs, historical cooking, camp cooking techniques, how to use a Dutch oven.